Crafts for Kids | Very Easy Crafts To Do At Home
Crafts for Kids: Discover a collection of incredibly simple crafts perfect for kids to enjoy at home. These crafts are specifically designed for toddlers, allowing them to have fun and entertain themselves. Explore a variety of crafting ideas, including slime recipes using borax, easy slime recipes, fluffy slime recipes, clear slime recipes, and more tailored for children’s creative enjoyment.
CRAFTS FOR KIDS PLAYING AND FUN
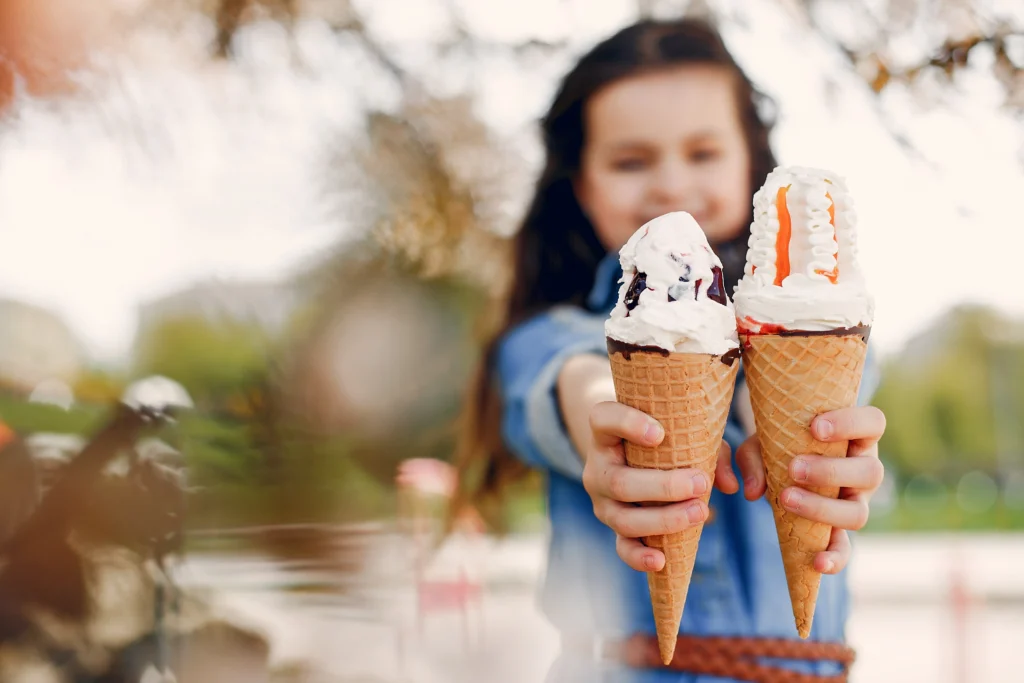
Homemade Ice Cream crafts:
Homemade ice cream crafts typically involve making ice cream from scratch using household ingredients and simple tools. Here’s a basic recipe for making homemade ice cream:
Ingredients:
- 2 cups heavy cream
- 1 cup whole milk
- ¾ cup granulated sugar
- 1 tablespoon pure vanilla extract
Instructions:
- In a mixing bowl, whisk together the heavy cream, whole milk, sugar, and vanilla extract until the sugar dissolves completely.
- Pour the mixture into an ice cream maker and churn according to the manufacturer’s instructions. This usually takes about 20-25 minutes.
- Once the ice cream reaches a thick, creamy consistency, transfer it to an airtight container and freeze for a few hours until it’s firmenough to scoop. For a fun twist, you can add various mix-ins like chocolate chips, fruit, nuts, or sprinkles to the ice cream base before churning to create different flavors and textures.
Sidewalk Chalk for kids
Sidewalk chalk is an incredibly versatile and entertaining tool for kids to unleash their creativity outdoors. Here’s a brief rundown on using sidewalk chalk for kids:
- Drawing and Coloring: Kids can create vibrant artwork on sidewalks or driveways using colorful chalks. Encourage them to draw anything from imaginative scenes to hopscotch grids or their favorite animals.
- Educational Games: Sidewalk chalk can be used for educational purposes too. Write numbers, letters, shapes, or words on the ground for fun learning activities. Play games like “Simon Says” using chalk-drawn prompts.
- DIY Obstacle Courses: Design a creative obstacle course by drawing various shapes or lines for kids to follow, jump over, or navigate through. This can promote physical activity and coordination.
- Group Activities: Encourage collaborative projects where kids work together to create a large mural or storytelling through combined drawings.
- Washing Away Fun: Remember, the beauty of sidewalk chalk is that it’s temporary! When they’re done, kids can enjoy spraying the artwork away with water, leaving the canvas clean and ready for new creations.
Sidewalk chalk offers an engaging way for kids to express themselves artistically, play games, learn, and enjoy outdoor activities while allowing for easy cleanup afterward.Creating sidewalk chalk for kids is a fantastic DIY project! Here’s a simple recipe using household items:
Ingredients and Materials:
- Plaster of Paris
- Tempera paint or food coloring
- Water
- Toilet paper or paper towel tubes (for molds)
- Wax paper or aluminum foil
- Mixing bowl
- Spoon or spatula
- Scissors
Instructions:
- Prepare the Molds:
- Cut the toilet paper or paper towel tubes into shorter lengths, about 4-5 inches long.
- Cover one end of each tube with wax paper or aluminum foil, securing it with a rubber band or tape. These will serve as the bottoms of your molds.
- Mix the Chalk Base:
- In a mixing bowl, combine 1 part plaster of Paris with 1 part water. Stir well until it forms a smooth, paste-like consistency.
- Add tempera paint or a few drops of food coloring to the mixture. Mix thoroughly until the color is evenly distributed. You can use different colors to create a variety of chalk sticks.
- Fill the Molds:
- Pour the chalk mixture into the prepared molds, filling them to the top.
- Tap the molds gently on a flat surface to release any air bubbles and ensure the mixture settles evenly.
- Let it Set:
- Allow the chalk to dry and set completely. This typically takes around 24-48 hours, depending on the thickness of the chalk and the humidity in your area.
- Once dry, carefully remove the wax paper or aluminum foil from the bottoms of the molds.
- Unmould and Use:
- Peel away the cardboard tube from the chalk. You’ll have colorful homemade sidewalk chalk ready for artistic adventures!
- Remember, these homemade chalk sticks might be a bit softer than store-bought ones, so they may wear down faster. But they’re loads of fun for kids to create and use, adding a personal touch to outdoor art sessions!
Homemade Play Dough
- Creating homemade playdough is a simple and fun activity!
Here’s a standard recipe using common kitchen:
Ingredients: - 2 cups all-purpose flour
- 3/4 cup salt
- 4 teaspoons cream of tartar
- 2 cups water
- 2 tablespoons vegetable oil
- Food coloring (optional)
- Essential oils for scent (optional)
- Mix Dry Ingredients:
In a saucepan, whisk together the flour, salt, and cream of tartar untilnwell combined. - Add Wet Ingredients:
Gradually pour in the water and vegetable oil, stirring continuously to avoid lumps. - Cook the Mixture:
Place the saucepan over medium heat and cook the mixture, stirring constantly. It will start to thicken and form a dough-like consistency. - Optional Coloring and Scent:
If you want colored or scented playdough, this is the time to add food coloring (a few drops at a time) and essential oils (a drop or two) for fragrance. Keep stirring until the color and scent are evenly distributed. - Finish Cooking:
Continue to cook and stir until the dough pulls away from the sides of the pan and forms a ball. It should no longer be sticky.
Cool and Knead:
- Remove the dough from the heat and let it cool for a few minutes until it’s safe to handle.
- Transfer the dough to a clean surface and knead it until it’s smooth and pliable. Be careful as it might be warm.
Storage:
- Store the homemade playdough in an airtight container or resealable bags to keep it fresh. Properly stored, it can last for several weeks. This homemade playdough is great for sensory play and fostering creativity in kids. It’s a versatile activity that allows for different colors, scents, and even textures if you experiment with different ingredients like adding glitter or small beads.

Finger Paints
Creating finger paints at home is a fantastic way to engage kids in a messy, colorful, and artistic activity. Here’s a simple recipe using basic ingredients:
Ingredients:
- 1/2 cup cornstarch
- 3 tablespoons sugar
- 2 cups water
- Food coloring or liquid watercolors
- Small containers or muffin tin compartments for paint storage
Instructions:
- Mix Ingredients:
- In a saucepan, whisk together the cornstarch, sugar, and water until the mixture
is smooth and free of lumps.
- In a saucepan, whisk together the cornstarch, sugar, and water until the mixture
- Heat and Stir:
- Place the saucepan over medium heat and continuously stir the mixture. It will
start to thicken as it heats up. Keep stirring to prevent clumping.
- Place the saucepan over medium heat and continuously stir the mixture. It will
- Cook Until Thickened:
- Once the mixture has thickened to a pudding-like consistency, remove it from
the heat. It should be smooth and glossy.
- Once the mixture has thickened to a pudding-like consistency, remove it from
- Divide and Color:
- Allow the mixture to cool slightly. Then, divide it into smaller portions depending
on how many colors you want. - Add a few drops of food coloring or liquid watercolors to each portion and mix
well until you achieve vibrant colors.
- Allow the mixture to cool slightly. Then, divide it into smaller portions depending
- Store and Use:
- Pour each colored mixture into separate containers or the compartments of a
muffin tin for easy access. - Let the paints cool completely before using them. They can be used immediately
or stored in airtight containers for later use.
- Pour each colored mixture into separate containers or the compartments of a
Homemade finger paints are non-toxic and safe for children to use. They provide a wonderful tactile experience and allow kids to explore their creativity freely. Plus, the process of making the paints can also be part of the fun!
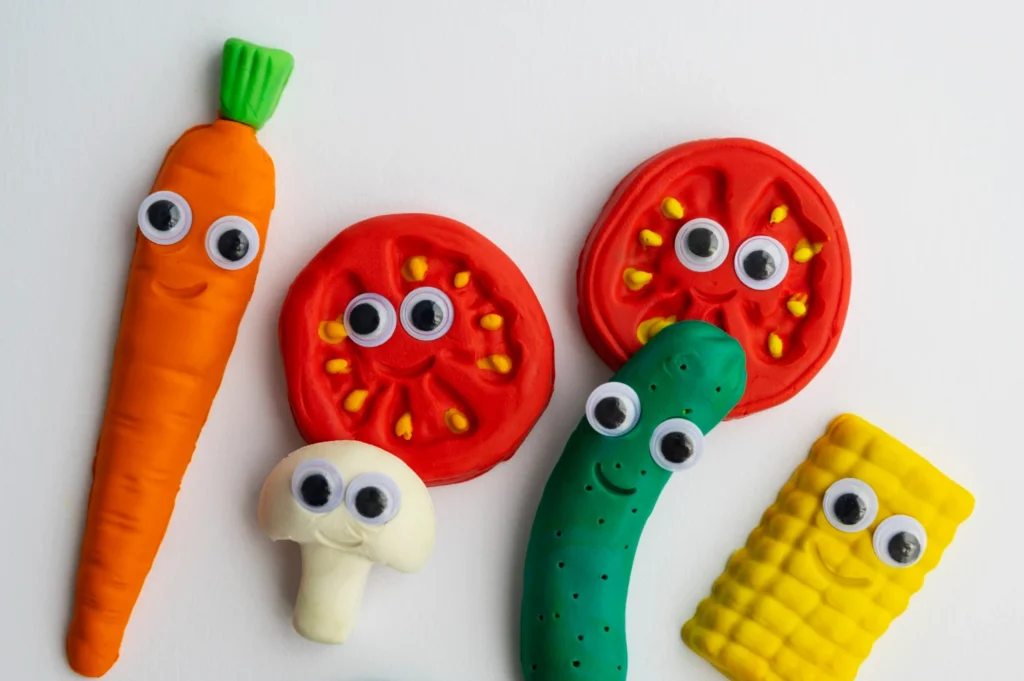
Quick and Easy Modeling Clay crafts:
Here’s a simple recipe for homemade modeling clay
that kids can use for various crafts:
Ingredients:
- 2 cups baking soda
- 1 cup cornstarch
- 1 1/4 cups water
Instructions:
- Mix Dry Ingredients:
- In a saucepan, whisk together the baking soda and cornstarch until they’re well
combined.
- In a saucepan, whisk together the baking soda and cornstarch until they’re well
- Add Water and Cook:
- Gradually add the water to the dry mixture while stirring to create a smooth paste.
- Cook the mixture over medium heat, stirring constantly until it thickens and reaches a clay-like consistency. This usually takes about 5-10 minutes.
- Cool and Knead:
- Remove the saucepan from the heat and let the clay cool for a few minutes until it’s
safe to handle. - Transfer the clay onto a clean surface and knead it until it becomes smooth and
pliable. If it’s too sticky, add a little more cornstarch. If it’s too dry, sprinkle a bit of
water and continue kneading.
- Remove the saucepan from the heat and let the clay cool for a few minutes until it’s
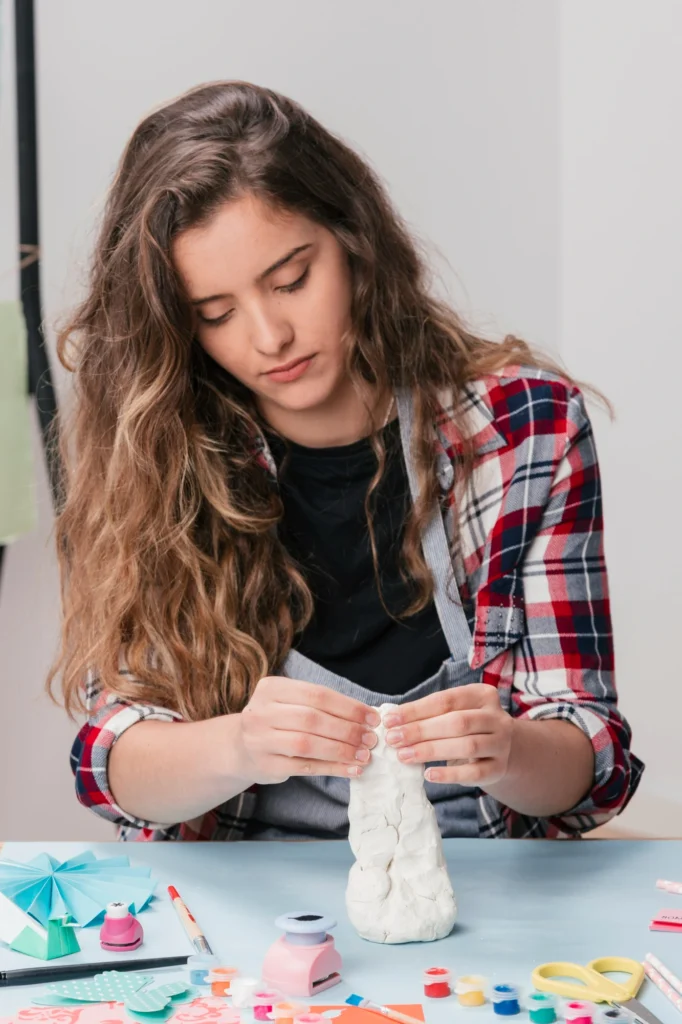
- Crafting:
- Once the clay is ready, let the kids; imagination soar! They can mold and shape the
clay into various figures, sculptures, or objects. It’s also perfect for making
handprints or small keepsakes.
- Once the clay is ready, let the kids; imagination soar! They can mold and shape the
- Drying or Baking (Optional):
- Air dry the creations by leaving them at room temperature for 24-48 hours until they
harden. This method is great for preserving intricate designs.
- Air dry the creations by leaving them at room temperature for 24-48 hours until they
Alternatively, if you’re in a hurry, you can bake the clay creations in the oven at a low temperature (around 200°F or 93°C) for about an hour or until they harden.
Quantity: This recipe yields a sufficient amount of modeling clay for several small to medium-sized projects.
Uses: The homemade modeling clay is excellent for various art and craft projects. It’s suitable for sculpting, molding, and creating decorative items or personalized keepsakes.
Storage: Store any unused clay in an airtight container or sealable plastic bag to prevent it from drying out. Keep it at room temperature. Properly stored, the clay can last for several weeks and remain pliable for future use.
This homemade modeling clay is easy to make, safe for kids, and can inspire endless creative possibilities. It’s a wonderful way for children to express themselves through art and crafting!
Flower Preservative crafts for kids
Creating flower preservatives can be a fascinating and educational craft for kids, especially if theyre interested in learning about plant preservation. Heres a simple DIY flower preservative project:
Ingredients:
- Clear glass or plastic vase or jar
- Water
- Sugar
- White vinegar or lemon juice
- Scissors (for trimming stems)
- Fresh flowers (cut flowers from the garden or store-bought)
Instructions:
- Prepare the Solution:
- Fill the vase or jar with clean, room temperature water.
- Add 2 tablespoons of sugar to the water. The sugar acts as food for the flowers, helping them last longer.
- Optionally, add a few drops of white vinegar or lemon juice to the water. The acidity helps prevent bacterial growth.
- Prepare the Flowers:
- Trim the stems of the flowers at an angle using scissors. Cut at least an inch from the bottom of each stem to create a fresh surface for water absorption.
- Arrange the Flowers:
- Arrange the freshly trimmed flowers in the vase or jar filled with the prepared
preservative solution. Make sure all the stems are submerged in the water.
- Arrange the freshly trimmed flowers in the vase or jar filled with the prepared
- Observe and Maintain:
- Place the vase in a cool area away from direct sunlight and heat sources.
- Change the water and trim the stems every few days to keep the flowers fresh. This helps prevent bacterial buildup and keeps the water clean.
- Explore and Learn:
- Encourage kids to observe the flowers regularly and note any changes. They can learn about how the preservative solution affects the flowers lifespan and appearance.
This flower preservative activity not only engages kids in a hands-on project but also teaches them about plant care and the science behind keeping flowers fresh. It’s a delightful way to introduce them to botany and the principles of preservation.
- Encourage kids to observe the flowers regularly and note any changes. They can learn about how the preservative solution affects the flowers lifespan and appearance.
Cool Slime
Making cool slime is a popular and entertaining activity for kids! Here’s a simple recipe for making slime that’s both cool to play with and easy to create:
Ingredients:
- 1/2 cup of clear school glue (such as Elmer’s Clear Glue)
- 1/2 cup of water
- 1/2 teaspoon baking soda
- 1 tablespoon saline solution (containing boric acid)
- Food coloring or glitter (optional for customization)
Instructions:
- Mix Glue and Water:
- In a mixing bowl, combine 1/2 cup of clear glue with 1/2 cup of water. Stir well to
mix thoroughly.
- In a mixing bowl, combine 1/2 cup of clear glue with 1/2 cup of water. Stir well to
- Add Baking Soda:
- Sprinkle in 1/2 teaspoon of baking soda and continue stirring until it's fully
incorporated into the glue mixture.
- Sprinkle in 1/2 teaspoon of baking soda and continue stirring until it's fully
- Add Saline Solution:
- Pour 1 tablespoon of saline solution into the bowl. Mix the solution into the slime
mixture. It will begin to come together and form slime.
- Pour 1 tablespoon of saline solution into the bowl. Mix the solution into the slime
- Knead and Customize:
- As the slime starts to form, knead it with your hands until it reaches the desired
consistency. If you want colored or glittery slime, add a few drops of food coloring or
glitter and continue kneading until evenly distributed.
- As the slime starts to form, knead it with your hands until it reaches the desired
- Play and Store:
- Have fun playing with the slime! Store it in an airtight container or a resealable bag when not in use to keep it from drying out. This cool slime recipe creates a stretchy, squishy, and colorful substance that kids love to play with. It’s a great sensory activity and allows for creativity by adding different colors, glitters, or even small decorative items like beads or sequins. Just ensure kids wash their hands after playing with slime and avoid getting it on fabrics or carpets to prevent potential stains.
Great Bubble Solution
Making a great bubble solution is fantastic for outdoor fun. Here’s a simple recipe that creates long- lasting bubbles:
Ingredients:
- 6 cups of water (distilled water works best, but tap water works too)
- 1/2 cup of dish soap (look for brands without added lotions or moisturizers)
- 1/2 cup of corn syrup or glycerin (acts as a humectant to make stronger bubbles)
- 1 tablespoon of baking powder (optional, can help with bubble longevity)
Instructions:
- Mix Ingredients:
- In a large container or bucket, pour in 6 cups of water.
- Add 1/2 cup of dish soap to the water. Gently stir to combine without creating too
many bubbles.
- Add Corn Syrup or Glycerin:
- Pour in 1/2 cup of corn syrup or glycerin into the solution. Stir slowly and thoroughly
to mix it in evenly.
- Pour in 1/2 cup of corn syrup or glycerin into the solution. Stir slowly and thoroughly
- Optional: Add Baking Powder:
- If desired, add 1 tablespoon of baking powder to the mixture. This can help the bubbles last longer.
- Let It Rest:
- Allow the bubble solution to sit for at least an hour or longer. This helps the ingredients meld and create stronger bubbles.
- Use and Enjoy:
- Pour the solution into a shallow container or a wide-mouth jar. Dip your bubble wands or bubble blowers into the solution and start making bubbles!
Remember, for the best bubbles, use bubble wands of different shapes and sizes. Experiment with different blowing techniques, and enjoy making giant, shimmering bubbles on a sunny day! If the bubbles seem to break easily, letting the solution sit for a few hours or overnight might improve its performance.
- Pour the solution into a shallow container or a wide-mouth jar. Dip your bubble wands or bubble blowers into the solution and start making bubbles!
Water Colors
Watercolors are a beautiful and versatile medium for artistic expression, especially for kids. Here’s a simple method to make homemade watercolor paint:
Ingredients:
- Baking soda
- Cornstarch
- White vinegar
- Light corn syrup
- Food coloring or liquid watercolors
- Ice cube tray or small containers for storage
Instructions: - Prepare the Paint Base:
- In a mixing bowl, combine 4 tablespoons of baking soda and 2 tablespoons of
cornstarch. Mix them well.
- In a mixing bowl, combine 4 tablespoons of baking soda and 2 tablespoons of
- Add Liquid Ingredients:
- Gradually add 3 tablespoons of white vinegar and 1 1/2 tablespoons of light corn
syrup to the dry mixture. Stir until it forms a smooth paste-like consistency.
- Gradually add 3 tablespoons of white vinegar and 1 1/2 tablespoons of light corn
- Divide and Color:
- Divide the paste into different compartments of an ice cube tray or small containers, depending on the number of colors desired.
- Add a few drops of food coloring or liquid watercolors to each compartment. Mix thoroughly until the colors are vibrant and evenly distributed.
- Let It Dry:
- Allow the paint to dry and solidify. This can take a few hours or overnight, depending on the humidity in your area.
- Using the Watercolors:
- Once the paints are dry, use a wet brush to pick up colors from the homemade watercolor palette.
- Experiment with different techniques like blending colors, creating washes, or using different brush strokes to create beautiful artwork.
This homemade watercolor paint is safe and great for kids to explore their creativity. Its a wonderful way to introduce them to painting and allow them to experiment with colors and techniques. Store the dried watercolors in airtight containers for
future use.
Thin & Paper Pastes
a) Simple Adhesive Paste:
- 1/4 cup sugar
- 1/4 cup all-purpose flour
- 1/2 tsp powdered alum
- 1-3/4 cups water
- 1/4 tsp oil of cinnamon
Instructions:
- In a medium-sized pan, combine sugar, flour, and alum.
- Gradually add 1 cup of water, stirring vigorously to break up lumps.
- Boil until the mixture is clear and smooth, stirring constantly.
- Add the remaining water and oil of cinnamon. Stir until thoroughly mixed.
- Makes one pint. Application: Spread the paste with a brush or tongue depressor. Thin Paste is an excellent adhesive for scrapbooks, collages, and strip papier-mâché. This paste can be stored in a jar for several months without refrigeration.
b) Homemade Paper Paste:
- 1/3 cup all-purpose wheat flour
- 2 tablespoons sugar
- 1 cup water
- 1/4 tsp oil of cinnamon
Instructions:
- Mix flour and sugar in a saucepan. Gradually add water, stirring vigorously to break up lumps.
- Cook over low heat until clear, stirring constantly.
- Remove from the stove and add oil of cinnamon. Stir until well blended.
- Makes about 1 cup. Application: Spread the paste with a brush or tongue depressor. Soft, smooth, thick, and white, Paper Paste has a good spreading consistency and is especially suitable for small children or any paste-up work. This paste can be stored in a covered jar for several weeks without refrigeration.
Silly Putty Recipes
Silly Putty is a classic and fun material that kids love to play with. Here are two simple recipes to make homemade Silly Putty:
Recipe 1:
- Cornstarch Silly Putty
Ingredients:- Cornstarch
- Liquid dish soap
- Instructions:
1. Mixing the Putty:- Start with a mixing bowl and add cornstarch.
- Slowly add liquid dish soap to the cornstarch while stirring continuously. The ratio
should be approximately 2 parts cornstarch to 1 part dish soap. - Keep stirring until a putty-like consistency forms. Adjust the amounts of cornstarch
and soap as needed until you reach the desired texture.
2. Kneading and Play:
- Once the mixture reaches the right consistency, take it out of the bowl and knead it with your hands. This will help to combine the ingredients thoroughly and create a smooth, pliable Silly Putty.
- Have fun playing with your homemade Silly Putty!
Recipe 2:
- Borax Silly Putty
- Ingredients:
- White school glue (such as Elmers Glue)
- Water
- Borax powder
- Food coloring (optional)
- Ingredients:
Instructions:
- Creating the Mixture:
- In a bowl, mix together equal parts of white school glue and water. For example, you
might use 1/4 cup of each. - Add a few drops of food coloring if you want colored Silly Putty.
- Activating with Borax:
- In a separate container, mix 1 teaspoon of borax powder with 1/2 cup of warm water. Stir until the borax is fully dissolved.
- In a bowl, mix together equal parts of white school glue and water. For example, you
- Combining and Kneading:
- Slowly pour the borax solution into the glue mixture while stirring continuously.
- As you mix, you’ll notice the mixture starting to come together and form a putty-like
consistency. - Knead the putty thoroughly with your hands until it becomes less sticky and more
stretchy. This may take a few minutes.
- Playtime:
- Enjoy playing with your homemade Borax-based Silly Putty! Store it in an airtight container when not in use to keep it from drying out. These homemade Silly Putty recipes are simple, safe, and offer a great sensory experience for kids. Always supervise younger children during playtime and ensure that the ingredients used are safe and non-toxic.
Clown Paint
- Clown paint, often referred to as clown makeup, is typically vibrant, colorful, and used to create exaggerated facial features for clown characters. Here’s a basic guide to creating clown paint:
Ingredients/Items:
- White face paint or clown makeup base
- Brightly colored face paints (red, blue, yellow, etc.)
- Makeup sponges or brushes
- Mirror
- Makeup setting powder (optional)
- Makeup setting spray (optional)
Instructions: - Preparation:
- Start with a clean, dry face. Tie back hair or use a headband to keep hair away from the face.
- Gather all your face paints, sponges or brushes, and have a mirror handy for application.
- Applying the Base:
- Begin with the white face paint or clown makeup base. Apply it evenly to the entire face using a sponge or brush. This creates a blank canvas for the colorful clown features.
- Creating Features:
- Use brightly colored face paints to create exaggerated features. Common clown features include:
- Red circles on the cheeks (usually using red face paint or lipstick).
- A large red nose (can be drawn with red face paint or a red sponge-tip
applicator). - Exaggerated eyebrows and eyes using bright colours like blue, yellow, or
green. - Red lips outlined in a bold colour like blue or black.
- Details and Outlining:
- Add finer details like lines, dots, or highlights using contrasting colours. This could
involve outlining features with a darker shade or adding decorative elements like
stars or hearts.
- Add finer details like lines, dots, or highlights using contrasting colours. This could
- Setting the Makeup:
- If desired, use a makeup setting powder to set the colors in place. Gently apply the
powder with a powder puff or brush. - Optionally, finish with a makeup setting spray to help the colours last longer and
prevent smudging.
- If desired, use a makeup setting powder to set the colors in place. Gently apply the
Remember, clown paint can vary widely based on the specific character or design you’re aiming for. Feel free to get creative and experiment with different colors, shapes, and patterns to create a unique and fun clown look! Always ensure that the makeup products used are safe for the skin andeyes, especially for younger users.
Flubber
Flubber, often known as slime or a polymer-based goo, is a fun and squishy substance popular
among kids. Here’s a simple recipe to make homemade flubber:
Ingredients:
- 1 cup white school glue (such as Elmer’s Glue)
- 3/4 cup warm water
- Food coloring
- 1/2 cup liquid starch (available in laundry sections at stores)
Instructions:
1. Mix Glue and Water: - In a mixing bowl, pour 1 cup of white school glue.
- Add 3/4 cup of warm water to the glue and mix thoroughly until well combined.
2. Add Food Coloring: - If you want colored flubber, add a few drops of food coloring to the glue mixture
and stir until the color is evenly distributed. - Incorporate Liquid Starch:
- Gradually pour 1/2 cup of liquid starch into the colored glue mixture.
- Stir continuously as you add the starch. You’ll notice the mixture thickening and becoming less sticky.
- Kneading the Flubber:
- Use your hands to knead and mix the flubber until it reaches a stretchy, gooey consistency. If it’s too sticky, add a bit more liquid starch. If it’s too stiff, add a little water.
- Playtime:
- Now the flubber is ready to play with! It can be stretched, molded, and squished.
Experiment with different shapes and textures.
- Now the flubber is ready to play with! It can be stretched, molded, and squished.
- Storage:
- Store the flubber in an airtight container or resealable bag when not in use to prevent it from drying out. Properly stored, it can last for several weeks.
This homemade flubber is a fantastic sensory play material for kids. It’s non-toxic and provides an enjoyable hands-on experience while also ntroducing concepts of polymers and non-Newtonian fluids in a playful way!
- Store the flubber in an airtight container or resealable bag when not in use to prevent it from drying out. Properly stored, it can last for several weeks.
Soup Crayons
Soap crayons are a fantastic way to make bath time more fun for kids. They allow children to draw and create art on bathtub walls while also cleaning up easily. Here’s a simple recipe to make homemade soap crayons:
Ingredients/Items:
- Clear glycerin soap base (available at craft stores)
- Liquid soap colorants or food coloring
- Soap fragrance or essential oils (optional)
- Silicone molds or ice cube trays (for shaping the crayons)
- Microwave-safe bowl or double boiler
- Spoon or stirring stick
Instructions:
- Prepare the Soap Base:
- Cut the clear glycerin soap base into small chunks or cubes to speed up melting.
- Melt the soap base using a microwave-safe bowl in short intervals (30 seconds at a
time, stirring in between) or by using a double boiler on the stove until it’s
completely melted and smooth.
- Adding Color and Scent:
- Once melted, add liquid soap colorants or food coloring to achieve the desired
colors for your soap crayons. Remember, a little goes a long way, so start with a few
drops and mix well. You can also add soap fragrance or essential oils for a pleasant
scent.
- Once melted, add liquid soap colorants or food coloring to achieve the desired
- Pouring into Molds:
- Carefully pour the colored and scented melted soap into silicone molds or ice cube trays. Fill each mold completely with the soap mixture.
- Cooling and Setting:
- Let the soap crayons cool and set. You can speed up the process by placing them in
the refrigerator for quicker solidification.
- Let the soap crayons cool and set. You can speed up the process by placing them in
- Removing from Molds:
- Once completely solidified, gently pop the soap crayons out of the molds. Silicone molds make this step easier due to their flexibility.
- Using the Soap Crayons:
- Now, kids can use these soap crayons to draw and create on the bathtub walls or tiles during bath time. The drawings can be easily washed away with water after play. These homemade soap crayons are a playful and practical way to make bath time enjoyable for kids. They’re easy to make, safe for use, and encourage creativity while also serving a functional purpose of cleaning.
Pun Mache
Paper mache, a versatile and affordable crafting technique, involves creating objects by layering paper and adhesive to form a sturdy structure. Here’s a basic guide to making paper mache:
- Materials:
- Newspaper or any thin paper (tissue paper, paper towels)
- Flour
- Water
- Mixing bowl
- Stirring stick
- Balloon or wire armature (if creating a specific shape)
- Instructions:
1. Prepare the Paste: - Create a paper mache paste by mixing flour and water. Start with a ratio of approximately 1
part flour to 1.5 parts water. For example, mix 1 cup of flour with 1.5 cups of water. - Stir the mixture thoroughly to remove any lumps until it has a smooth consistency similar to
pancake batter. If needed, you can adjust the ratio to achieve the desired thickness. - Prepare the Base or Armature:
- If you’re creating a specific shape or object, build a wire armature or use a balloon as a base.
- Inflate the balloon to the desired size or shape it with wire, cardboard, or any other material as a framework.
- Create the Paper Mache Layers:
- Tear or cut the newspaper or thin paper into strips or pieces. Strips about 1-2 inches wide work well.
- Dip the paper strips into the paste, coating them thoroughly, and remove any excess paste by running the strip between your fingers.
- Apply the paper strips onto the base or armature, overlapping them slightly to create layers.
Smooth out each layer to remove air bubbles and ensure adhesion.
- Build Layers and Let It Dry:
- Continue layering the paper strips until the entire surface is covered. Aim for at least three layers to create a sturdy structure.
- Allow the paper mache to dry completely between each layer. This might take a day or more, depending on the thickness and humidity. Ensure proper ventilation to aid the drying process.
- Finishing Touches:
- Once the paper mache is fully dry and hardened, you can sand, paint, or decorate it as desired to achieve the desired appearance.
Paper mache is a versatile technique used to create various items like masks, sculptures, pinatas, and more. It’s a great way to unleash creativity while utilizing simple materials.
Face Paint
Face painting is a fun way to add color and creativity to events, parties, or simply for artistic expression. Here’s a basic guide to using face paint:
Materials:
- Face paint palette or face paint sticks
- Makeup sponges or brushes
- Water
- Towel or wipes for cleaning
- Instructions:
1. Preparing:- Ensure the face paint used is non-toxic and specifically labeled for use on the face. Test a
small area of skin for any allergic reactions before applying it to the entire face. - Start with a clean, dry face. Tie back hair or use a headband to keep hair away from the face.
- Ensure the face paint used is non-toxic and specifically labeled for use on the face. Test a
- Application:
- Dip a clean makeup sponge or brush into water and then into the desired color of face paint.
- Work the paint to a smooth consistency on the palette.
- Apply the face paint to the skin using gentle strokes. Use the sponge for larger areas and brushes for finer details.
- Start with lighter colors before moving to darker ones to prevent smudging or mixing colors unintentionally.
- Creating Designs:
- Have fun creating designs! Some popular designs include animals, superheroes, flowers,
stars, or abstract patterns. Reference pictures or templates if needed. - Take your time, and if you make a mistake, you can use a damp cloth or makeup wipe to
gently remove the paint and start again.
- Have fun creating designs! Some popular designs include animals, superheroes, flowers,
- Details and Finishing:
- Add finer details using smaller brushes or different colors. Outline shapes, add highlights, or
incorporate glitter for extra sparkle. - Allow the face paint to dry completely before touching or adding additional layers.
- Add finer details using smaller brushes or different colors. Outline shapes, add highlights, or
- Safety and Removal:
- Face paint is generally safe but avoid painting near the eyes or on irritated or broken skin.
Use caution when removing face paint, especially with sensitive skin, and use makeup
remover or gentle cleansers.
Face painting is a delightful activity that allows for creativity and expression. Always ensure that the
face paint used is safe, especially for younger users, and properly remove it after use to prevent any
skin reactions or irritation.
- Face paint is generally safe but avoid painting near the eyes or on irritated or broken skin.
Soap Surprises
Surprise Soap Dough for Kids:
Encourage your children to enjoy bath time with this entertaining soap that reveals a hidden surprise as it gets used up!
Materials:
- 1 cup of grated Ivory soap
- 1/4 cup warm water
- Food coloring
- Small rubber toy (Ensure the toy has no sharp edges)
Instructions:
- Mix water, soap, and food coloring in a medium bowl. Stir the mixture until it starts to thicken.
- Remove the mixture from the bowl and knead it until it reaches the consistency of very thick dough.
- Roll the dough into a ball shape.
- Create a hole in the center of the ball large enough for the small rubber toy to fit inside.
- Fill the hole with the treasure, then seal it with some extra dough.
- Allow it to dry overnight before use.
Note: The Exploding Volcano activity may get messy!
Homemade Bath Salts!
Homemade Soothing Bath Salts:
Ingredients:
- 2 1/2 lb. Epsom Salts
- Food Coloring
- Perfume or scented oil
Instructions:
- Combine Epsom salts with food coloring and perfume in a large bowl.
- Mix thoroughly to ensure an even color distribution.
- Transfer the mixture into smaller jars.
- Allow it to stand for 4-6 weeks before using. This resting period allows the fragrance to meld with the salts.
Enjoy a very soothing and relaxing bath with these homemade bath salts.
Potpourri
Potpourri Gel “Gift in a Jar” Recipe:
Ingredients:
- 2 cups liquid potpourri
- 4 packets powdered gelatin
- Up to 2 cups water (optional, depending on desired consistency and scent intensity)
Directions:
- Heat 1 cup of liquid potpourri in an old pot on high heat until it begins to simmer.
- Reduce heat to low to maintain a simmer without boiling. Stir in the powdered gelatin, ensuring it dissolves completely.
- Remove from heat and add the second cup of liquid potpourri. Stir well.
- Add water if a more liquid consistency is desired, keeping in mind that it may reduce the overall scent intensity.
- Pour the mixture into warmed jars.
- Leave the jars uncovered and undisturbed overnight to allow the mixture to set into a jelly-like substance.
- Once set, cover the jars with lace, tulle, or other decorative tops for a visually appealing room freshener.
Note: The 8-ounce jars can last about 8 months, with the lifespan depending on the amount of water added. A gift tag with a description, recipient details, and a cautionary note to keep away from children can be added for a personalized touch.
Birdseed Biscuits
Cookie Cutter Bird Treats:
Brought to you by 2CoolBaby
Ingredients:
- 2 cups biscuit baking mix
- 1/2 cup cold water
- 2 tbsp margarine
- 2 tbsp sesame seeds
- 2 tbsp sunflower seeds
Instructions:
- Preheat the oven to 425°F.
- Form a soft dough by combining the baking mix and water.
- Roll out the dough to a thickness of 3/4 inch and cut into shapes using cookie cutters.
- Use a straw to punch a hole in the top of each cookie.
- Melt the margarine and brush it over the dough.
- Sprinkle sesame seeds and sunflower seeds onto the dough, pressing them in firmly with a fork.
- Bake for 15-20 minutes or until light brown.
- Once cool, thread brightly colored ribbon through the hole and hang it in a tree.
Pine Cone Bird Feeders:
- Spread wax paper on the table.
- Place a thin layer of smooth peanut butter on the wax paper.
- Children roll a pine cone in the peanut butter and then in birdseed.
- Attach a string to the pine cone and hang it in a tree.
Enjoy these nature-friendly activities with your little ones!
Doggie Biscuits for Your Pet
Homemade Dog Biscuits Recipe:
Ingredients:
- 1 1/2 cups whole wheat flour
- 1 cup all-purpose flour
- 1 cup powdered milk
- 1/3 cup bacon grease (can substitute beef fat or chicken fat)
- 1 egg, lightly beaten
- 1 cup cold water
Directions:
- In a bowl, combine flour and milk powder.
- Drizzle with melted fat.
- Add egg and water; mix well.
- Gather dough into a ball.
- On a floured surface, pat out dough.
- Roll out to 1/2 inch thickness.
- Cut into desired shapes.
- Gather up scraps of dough and repeat rolling and cutting.
- Bake on ungreased baking sheets in a 350-degree oven for 50-60 minutes or until crispy.
- (You can store it in the fridge)
Yield: Makes about 36 – 2 1/2 inch biscuits.
Enjoy making these tasty treats for your furry friends!